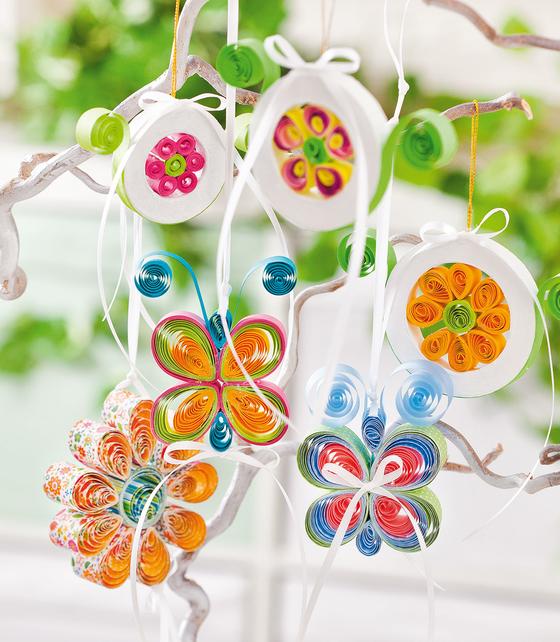
Butterflies from wide strips
For one wing of the butterfly you need three Paper strips, a quilling pen (alternatively also shashlik skewer) and a circle template. To fix the wing shape a cork plate with Pins is also advantageous.
1. The butterfly wings
Glue three Paper strips together to form a single straight long strip. The long strip is screwed onto the quilling pin. In the circle template the circle may slowly pop up, leading the Quilling pin to the end of the page at the edge. From there, press the circle together with your fingers to create a drop shape. Now pull out the pen, press the rolled up Paper at the same time firmly together so that the circle does not jump apart.
All in all four wings for one butterfly are created.
2. Butterfly feeler
For the butterfly feelers, a Paper strips is cut in half and one end of each of the two halves is rolled up.
3. Head and torso of the butterfly
For the fuselage a Paper strips is cut in half and the two halves are turned up tightly. The untwisted Paper is loosened a little between the fingers of only , but must not jump up. Two drop forms are made from the two halves for head and torso.
4. Glueing the butterfly together
The wings, the fuselage and head and the antennae are accordingly folded into a butterfly. The glue is now applied at the points of contact. For drying a cork base is suitable on which the butterfly is fixed with the help of some Pins . This has the advantage that the wings are not deformed when they are pressed together.
5. Decorate
The butterflies are decorated with Satin ribbon and are especially beautiful as a hanger.
Big blossom
For the large flower is best suited to a somewhat wider Paper. The inner circle of the is made with the help of the quilling Stencil . The petals are worked like the butterfly wings and everything is fixed with glue. Also the big flower is decorated with Satin ribbon or the suspension is made with Satin ribbon .