- Free shipping from 69 € within Switzerland
- Secure order
- Easy return shipment
- Service-Hotline +41 71 511 23 70Mo.-Fr. 9 - 17 h
Instructions No. 2111
Difficulty: Beginner
Working time: 3 Hours
First cover the surface with a waterproof mat.
Mix the paste according to the instructions on the packet and wait until the consistency becomes a little firmer. Tear the straw silk completely into small pieces.
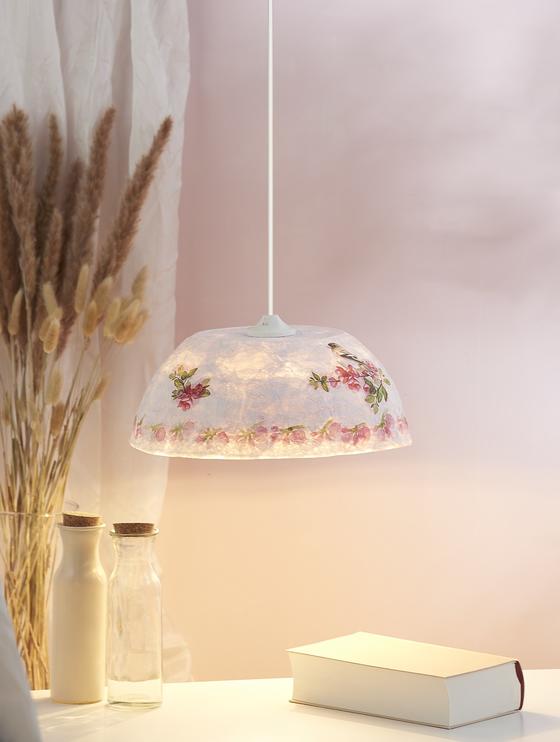
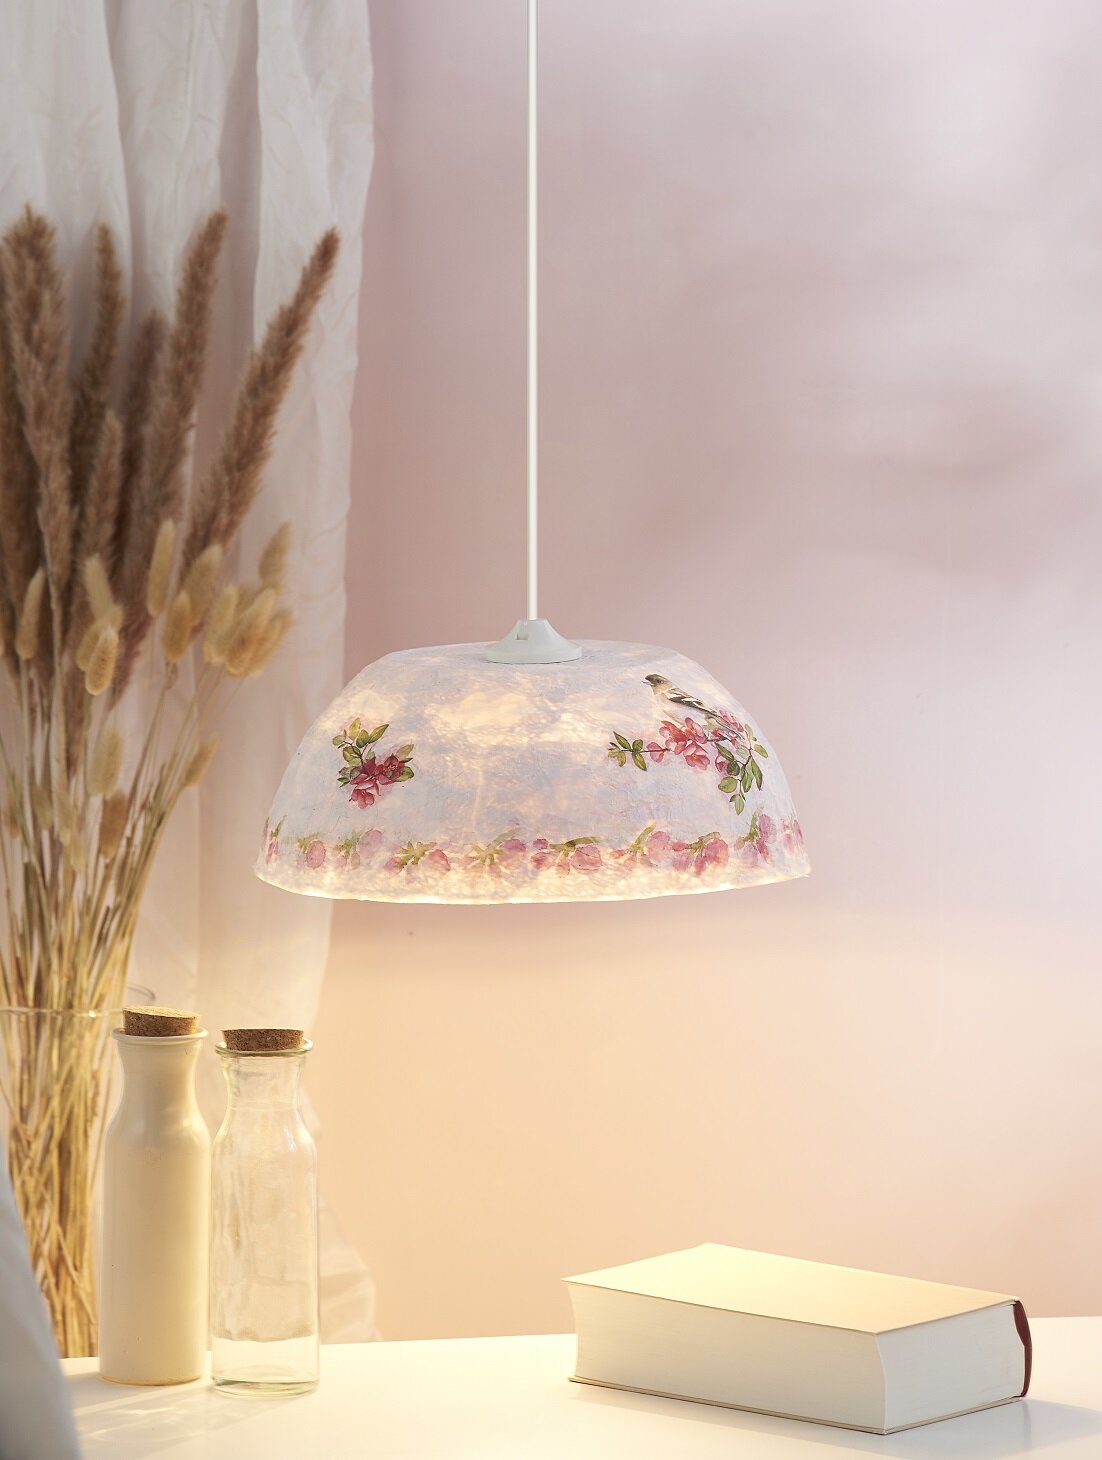
Spray the inside of the planter with baking spray. This makes it easier to remove the "lamp". Now glue the inside of the lampshade completely with paste and the straw silk. As soon as the straw silk is completely used up, glue on the lace doilies in different sizes. Set aside to dry.
Meanwhile, colour two paper doilies with the Aqua Paint markers and water. Allow to dry. Cut off the lace edges and stick them to the top of the lamp with paste.These will be visible from the inside when the lamp is hung up. These will be visible from the inside when the lamp is hung up. Let everything dry for about 24 hours.
Now the lamp can be decorated. In our example, we decided to use the napkin technique: cut out the desired motifs from the napkin, remove the unprinted layers and stick the motifs on with napkin varnish. Allow to dry again.
Cut a hole in the top of the lamp with the cutter and attach the lamp connector.


