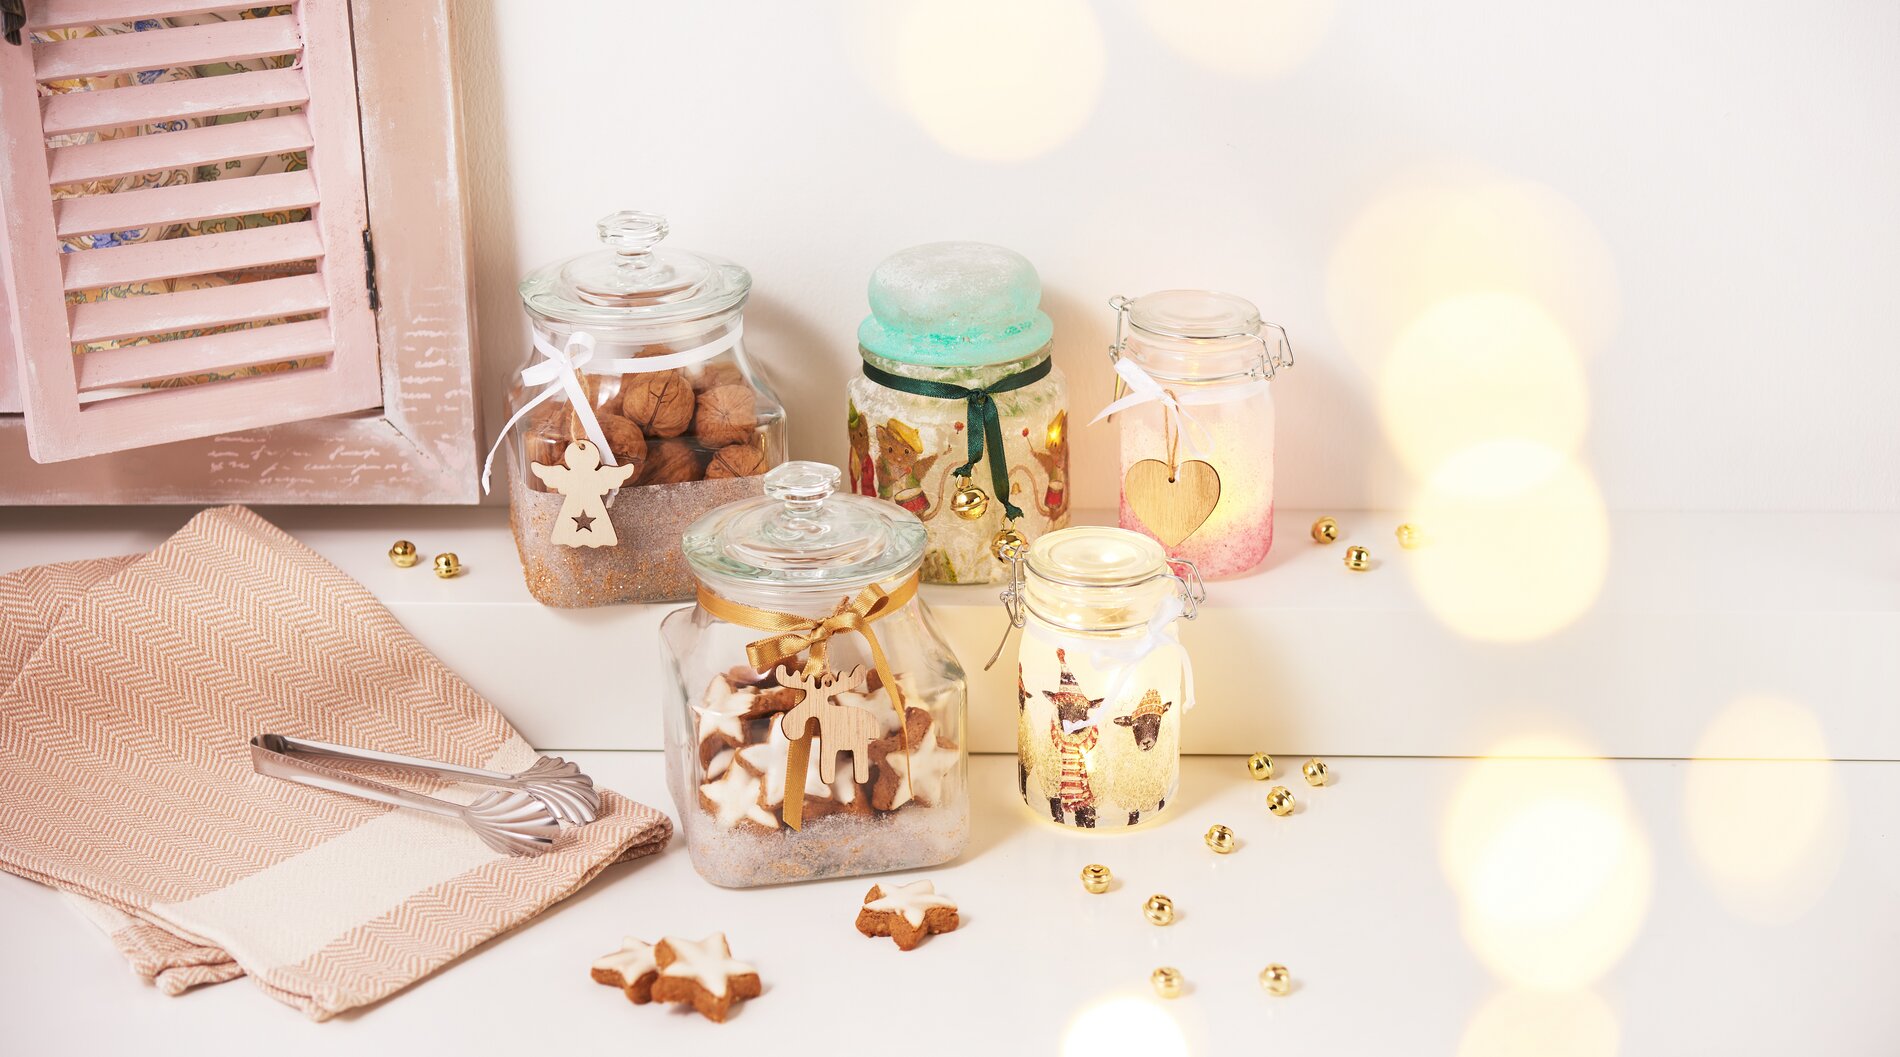
Creative DIY wind lights with a frosty design: detailed instructions
Attach the napkin
Cut out the motif: Carefully cut out the desired motif from a napkin. For this technique, you only need the top, printed layer of the napkin.
Prepare the glass: Coat the glass evenly with napkin paint. Make sure that the layer is not too thick to avoid bubbles forming.
Place the motif: Carefully place the cut-out and top printed layer of the napkin on the glass and press down lightly. Use a soft brush or your fingers to smooth out any creases.
Apply napkin varnish: Coat the motif again with napkin varnish. Make sure you work from the centre outwards to avoid creases and air bubbles. Leave the varnish to dry completely.
Achieve frosty effects
Apply frost effect paint: For a frosty effect, you can first dab the glass with frost effect paint. This special effect paint creates an icy look on the glass. You can intensify the frosty effect by colouring the paint with a colour concentrate.
Dab and sprinkle: Apply the frost effect colour to the glass with a painting sponge using light, dabbing movements. This will give you the desired texture. Then sprinkle over some mica flakes while the colour is still wet.
Decorate and use the glass
Leave to dry: Wait until the glass is completely dry. This can take several hours, depending on the thickness of the layers applied.
Fill and decorate: Now you can fill the jar as you wish. Treats, fairy lights or LED tea lights are ideal. Finally, decorate the jar with pretty ribbons, sprinkles and small bells to complete the design.
With these instructions and a little creativity, you can create beautiful, frosty glasses that are guaranteed to turn heads. Visit our online shop to purchase all the materials you need for the napkin technique and frost effect. Start your creative project today and let your imagination run wild!
Experience the joy of crafting and decorating with our extensive range of creative and craft items!