Strahlende DIY-Geschenkverpackungen: Schachtel falten leicht gemacht
Step 1: Print out and transfer templates
Firstly, print out the templates. Transfer the template for the large star onto a sheet of folding paper. You will need a total of two sheets of folding paper for one box. The small, simple star will end up as the lid on the back of the box.
Step 2: Prepare the large star
The best way to transfer the large star is to use blue paper. Carefully cut out the star and then start folding the lines. Folding means that you go along the lines and crease them slightly so that the fold lines are clearly visible.
Step 3: Cutting and gluing
Now cut the dotted lines. These cuts are necessary so that the corners of the star overlap when glued together. Glue the overlapping corners together to create the distinctive star points. Make sure that the glue dries well before you continue.
Step 4: Filling the mini box
Now comes the exciting part: fill the finished box! It is particularly suitable for small gifts such as jewellery or other small surprises. Carefully place the gift in the box and prepare for the final step.
Step 5: Seal the back
To close the box, tape the open back with the small star. Press the small star firmly until the glue is completely dry. This will keep the gift securely in the box.
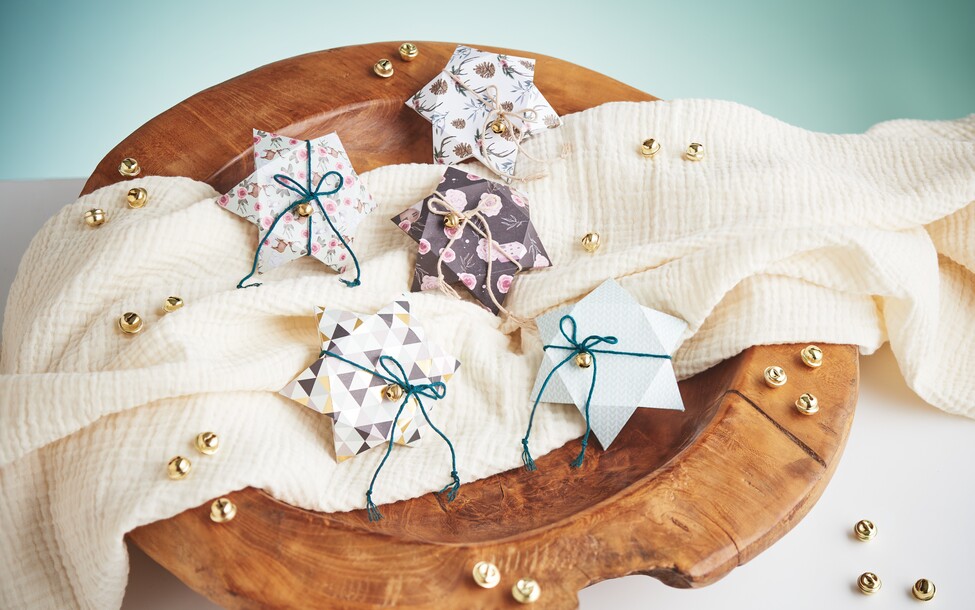
Step 6: Attach decorations
Add the finishing touches to your gift wrappings by decorating them with a pretty ribbon and a small jingles. These little details will make your box extra special and show that a lot of love and effort has gone into this gift wrapping.
Now you are ready to fold a magical box with your own hands and fill it as you wish. It's not only fun, but also a lovely gesture to give the gift of happiness and joy.