Instructions for a simple flowering
First crochet 6 - 8 air stitches and close these Chain to a ring.
Crochet into the ring evenly distributed 12 firm stitches and finish the round with a warp stitch into the first firm stitch. In the second round, work an air stitch first. Now crochet 1 half stick, 2 whole sticks, 1 half stick into the next fixed stitch. Make sure that these 4 sticks are crocheted in a firm stitch. Crochet 1 warp stitch in the next fixed stitch. Repeat steps 4 and 5 6 times in total. This will create 6 petals. The simple flower is ready.
You can vary these instructions by not crocheting the stitches of the 2nd round from the front through both links of the fixed stitch, but rather stitch only into the back link of the fixed stitch. This will highlight the inner ring.
Instructions for a Flower-Power-Flower
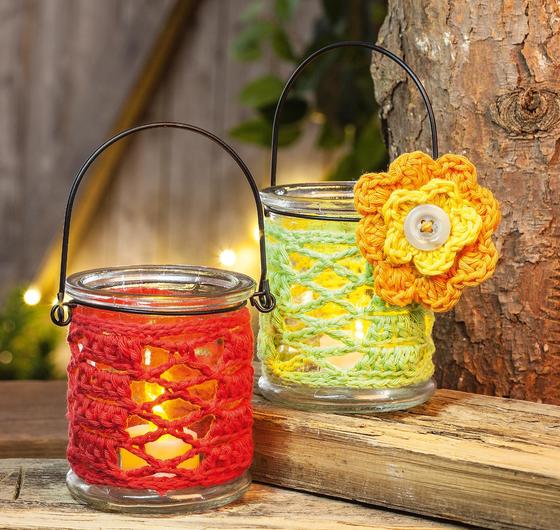
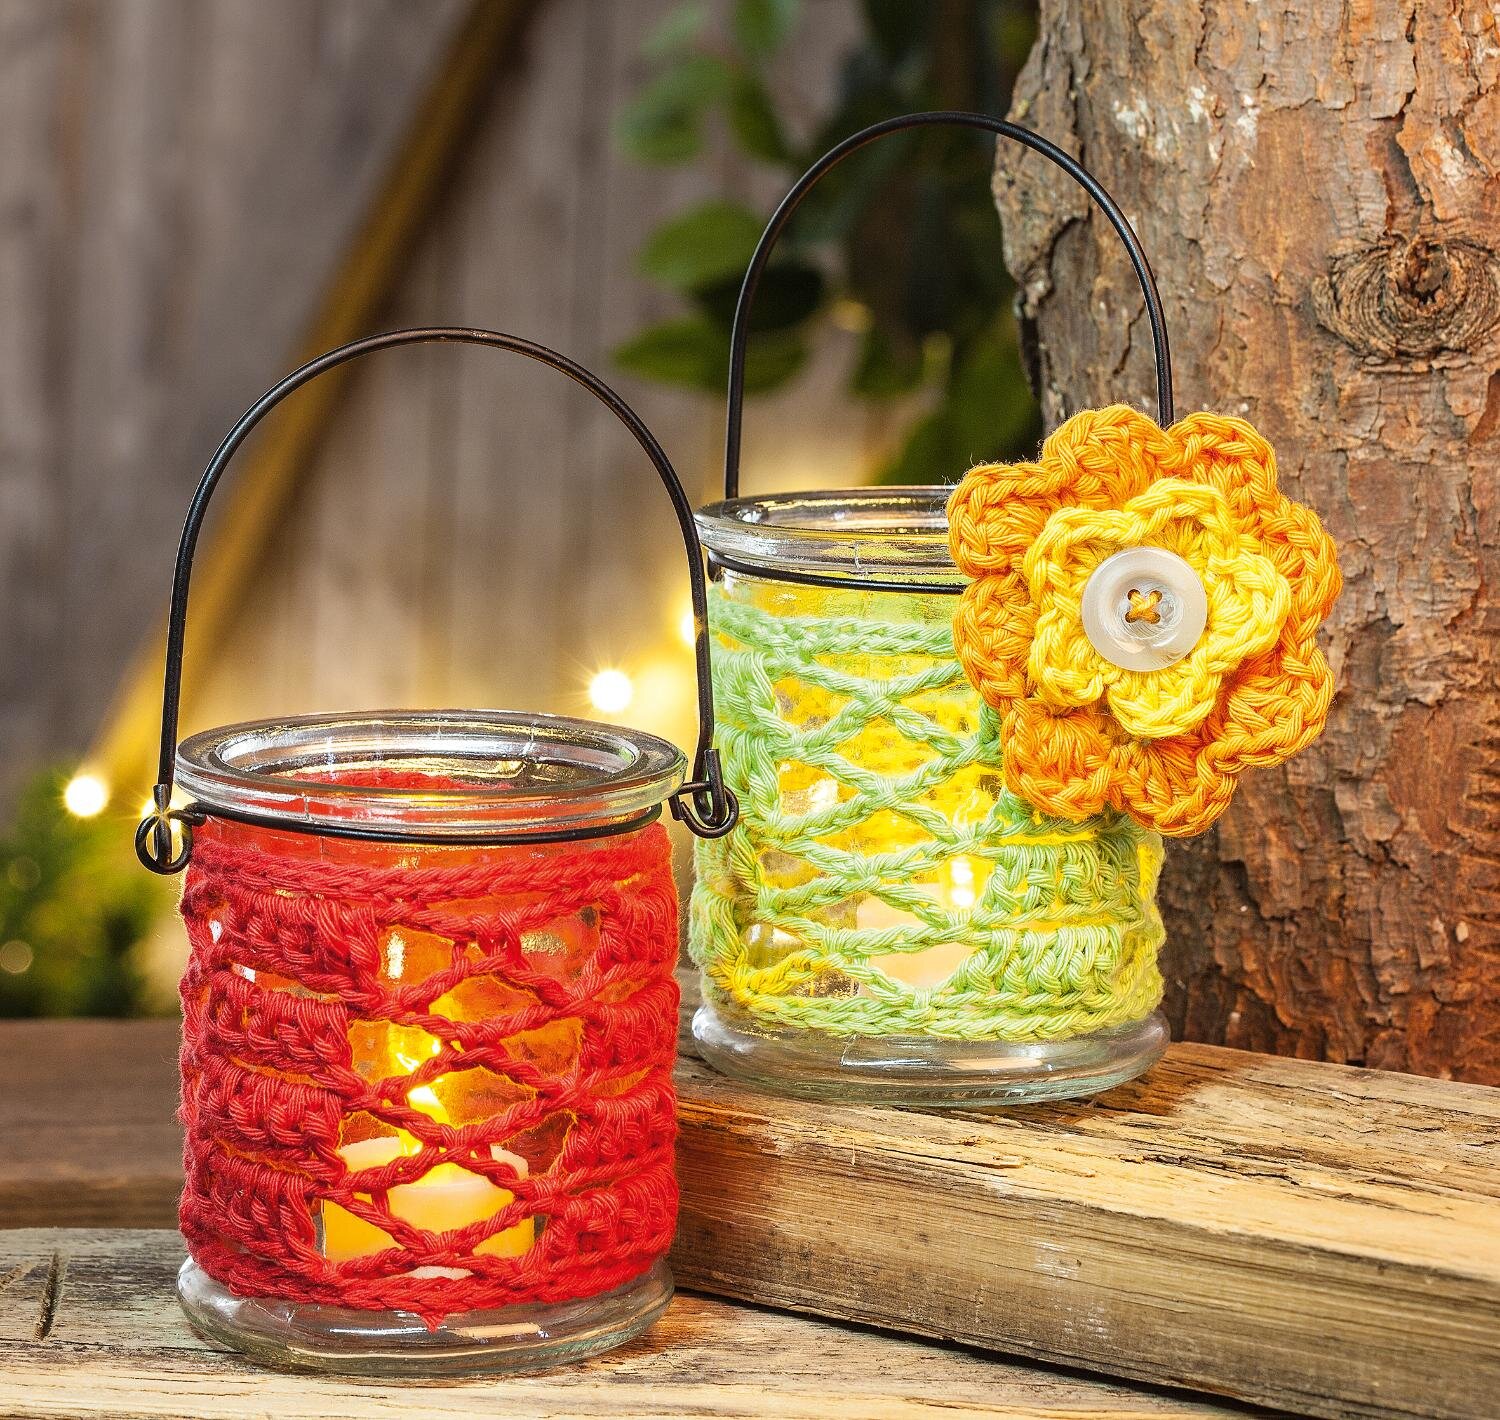
The flowers in these instructions have a diameter of about 5 cm.
Cast 6 air stitches and close them with a warp stitch to form a ring.1
In the first round crochet 4 air stitches first. Now follow 1 wale and 2 air stitches. Repeat this 7 times in total and distribute the sticks evenly around the ring. Close the round with 1 warp stitch in the 2nd air stitch of the beginning. In the 2nd round work 1 air stitch. Then crochet a firm stitch in each stitch of the previous round. This is a total of 24 firm stitches. Always stitch into the back link of the stitch.
In the 3rd round work 1 air stitch first. In the 2nd stitch of the previous round, work 1 wale, 3 double wales and nocmal1 wales. Skip 1 stitch and in the next stitch crochet 1 fixed stitch.
Repeat steps 7 and 8 a total of 7 times and finish the round with 1 warp stitch in the 1st air stitch.
The flower power blossom is ready.
In addition, we then sewed both flowers together and added a button.